

Latte Art: From Foam to Pour
Like Duolingo, but for Latte Art: From Foam to Pour. Tomo turns the whole topic into a game you play five minutes a day, until it actually sticks.
For the part of you with thirty open tabs that never became anything.
A short one: 12 levels across 2 sections, about 24 minutes end to end, roughly 5 days at five minutes a day. It moves through Getting the Foam and Flow Right and Pouring and Troubleshooting Shapes. It starts from scratch.
Free forever · No credit card · iPhone & Android

Key ideas in Latte Art: From Foam to Pour
- Air must be introduced early while milk is cool using a quiet paper-tearing sound
- Body temperature (lukewarm to the hand) is the cue to stop stretching and submerge the tip
- The second phase only spins and folds the milk to blend the foam
- Tilting the pitcher slightly off-center creates a rolling whirlpool vortex
- The spinning vortex breaks big bubbles into tiny, invisible microfoam
- Properly textured milk should look like wet, glossy paint before pouring
- Too much air creates thick, dry foam like shaving cream
- Stiff foam cannot slide across the espresso surface to form crisp latte art patterns
- Milk for latte art must stay fluid enough to pour smoothly
- Under-aerated milk lacks the tiny bubble structure needed to float on crema
- Liquid hot milk without enough foam cuts straight through the espresso bed to the bottom
- Latte art requires just enough microfoam buoyancy to sit on top of the dark crema
- Foam naturally floats and separates from liquid milk within seconds of steaming
- Swirling keeps the foam and warm milk blended into a single pourable liquid
- Letting milk sit still results in pouring watery milk first and a clump of foam last
- Pouring from roughly three inches high gives milk enough downward momentum to pierce beneath the crema
You've tried the other tabs
Thirty open tabs. Four facts you actually kept.
You watched. You nodded. By Sunday it was gone.
One answer, then back to scrolling.
Eight weeks. You meant to finish. You didn't.
Tomo gives Latte Art: From Foam to Pour the Duolingo treatment: levels, streaks, and quick quizzes that test what you just learned. That game loop is what the tabs above never had, so it's the one you actually finish.
Here's what playing it feels like
A real question from this course. Take your best guess.
When should you stop adding air and bury the tip of the steam wand deeper?
Get it right to open this lesson and 11 more in the app.
Where Latte Art: From Foam to Pour takes you
Stop pouring cloudy blobs and start creating crisp, intentional designs. Learn how to steam silky microfoam, control pour height, and fix common beginner mistakes.
- 1
Getting the Foam and Flow Right
- Steaming Silky Microfoam
- Height and Tilt Mechanics
- 2
Pouring and Troubleshooting Shapes
- Pouring the Classic Heart
- Diagnosing Common Pour Mistakes
2 sections · 4 units · 12 levels. Built to play, not to enroll.
You pick the voice
Latte Art: From Foam to Pour is taught in the The Bestie style: your friend who just gets it. Want a different feel? In the app you can spin up the same topic in any of Tomo's teaching styles. Same facts, totally different vibe.
More Food & Drink on Tomo

Latte Art at Home
Turn your morning espresso into a café-quality canvas using simple physics and hand control. Learn to texture glossy microfoam, master pour height, and reliably pour hearts and layered tulips.

Pouring Latte Art
Transform everyday morning coffee into café-quality cups. Learn the fundamentals of steaming silky microfoam, mastering pitcher flow, and pouring clean hearts, rosettas, and tulips.

Pouring Latte Art
Transform everyday milk into silky microfoam and master the fluid dynamics of classic coffee designs. Learn how pitcher height, tilt, and wrist rhythm come together to pour crisp hearts, tulips, and rosettas.

Latte Art: The First Pour
Transform ordinary steamed milk into silky microfoam and pour crisp, beautiful designs. Learn the fluid mechanics of height, flow rate, and tilt to master hearts, tulips, and rosettas.
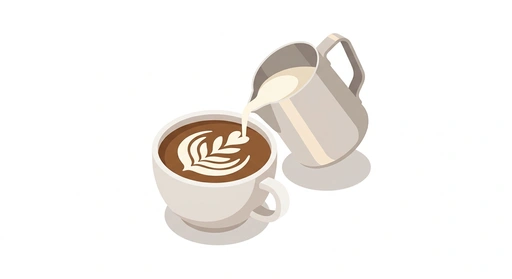
Pouring Your First Latte Art
Transform your morning coffee into a masterpiece by mastering the physics of microfoam and the fluid dynamics of the pour.

Latte Art: From Foam to Flourish
Master the physics of microfoam and the fluid dynamics of pouring to turn every paper cup into a canvas.
Start Latte Art: From Foam to Pour today.
Download Tomo, search Latte Art: From Foam to Pour, and play your first lesson in under a minute.